Lately I've been in a bit of a crochet rut. So for the past few days I've been spending my time surfing the web and checking out tons of free patterns trying to find one that really inspired me.
I've been getting more into Amigurumi style crochet projects. I haven't really done very many of these types of patterns.
My Crochet Amigurumi Voodoo Doll was the first major Amigurumi pattern that I worked on. I wanted something to inspire me like the Voodoo doll idea had but I hadn't been able to find anything until a friend showed me one that she was getting ready to start.
The pattern she showed me was for a
crochet Dalek. (click link for original pattern. Link also includes a chance to help out a needy family via the poster of the original pattern.)
I LOVED IT! It looks great but wasn't exactly what I wanted. The original pattern is a bit smaller than I wanted and calls for joins at the end of each row. I wanted something large and worked in continuous rounds so there is no seam line.
I decided to work the pattern using two strands of yarn and a J hook instead of the single strand and F that the pattern calls for. While the pattern was done well for the most part, it is a bit difficult to understand at times, there was a whole row I had to leave out to make it look right and another I had to change to make it look right as well. I also didn't like that the "arms" and "eye" were flat instead of round. I got about halfway through the pattern before I decided to pull it out and write up my own pattern inspired by the original one my friend showed me.
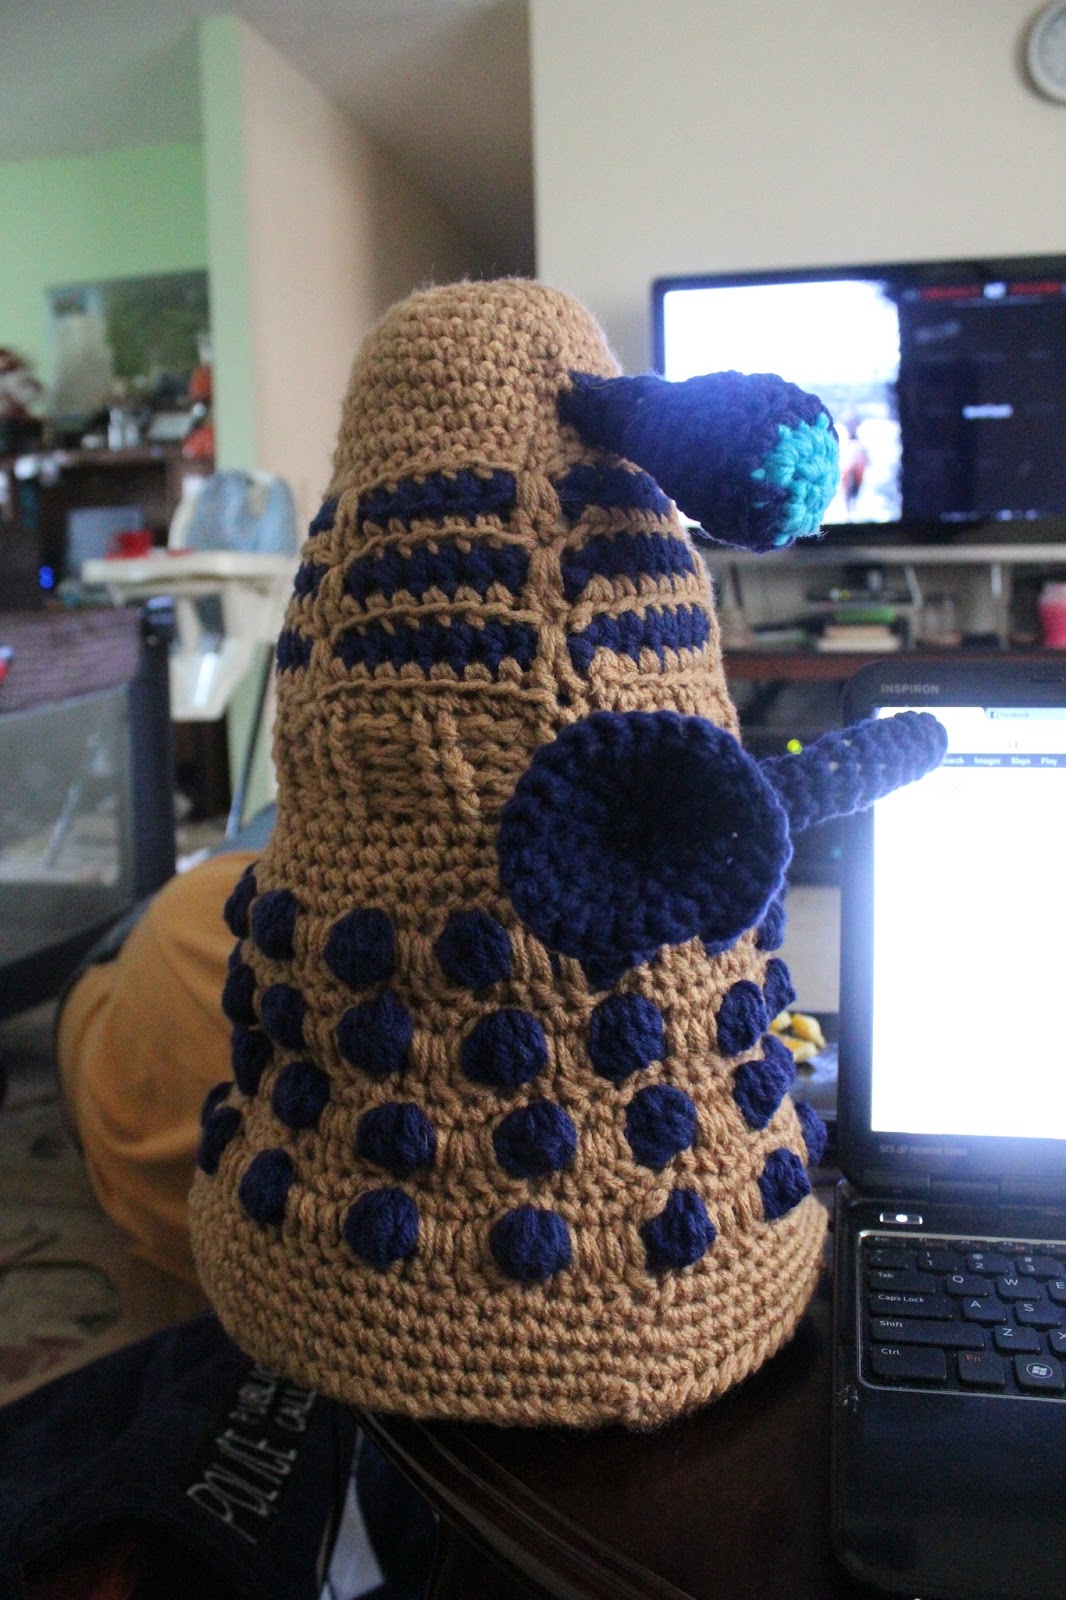
I designed a pattern to better fit using two strands and a larger hook size. I also added another color and changed a few of the rows to enhance the overall look of the Dalek. Then I added instructions for making the "eye" and "arms" round instead of flat and added instructions for making the "lights" for the top of the Dalek.
This was a super fun project to work on and it was made even better by the reaction of my daughter when she saw it. ("I LOVE DALEKS!")
She is currently running around my house with it yelling "EX-TER-ME-NATE!
So, here is is. Enjoy!
Hook Size: US J / 6.00MM
2 Strands of Worsted Weight Yarn in color A (I used Red Heart acrylic yarn for this project but I think it would work well in cotton as well.) For A I used a caramel color.
2 Strands of Worsted Weight Yarn in color B. For B I used a Navy color.
2 Strands of Worsted Weight Yarn in color C. For C I used a scrap of a bright blue color.
Poly Fill
Yarn Needles
Stitch Markers
This pattern is worked in continuous rounds using a stitch marker to keep track of where the row ends. Make sure you place the stitch marker in the last stitch of the row and make sure you move it up with each row so you can keep track of where you last stitch is.
Body:
1.) Start with color A. Using "Magic Circle" technique start with 12 sc into Magic Circle.
2.) sc in next st, 2 sc in next st around (18 sts)
3.) sc in next 2 sts, 2sc in next st around (24 sts)
4.) sc in next 3 sts, 2sc in next st around (30 sts)
5.) sc in next 4 sts, 2sc in next st around (36 sts)
6-12.) sc in each st around.
13.) Change to color B. Sl st into back loop only of first st of row. (st you sl st into at the end of previous row.) hdc into back loop only of same st and next 4 st, ch 1, sk 1 st, *hdc in back loop only of next 5 st, ch 1, sk 1 st* around.
14.) Change to color A. Sl st into first st of previous row. (st you joined to) *sc in next 5 st, 2dc in both loops skipped st of previous row* around. Join with a sl st to first st of row, fasten off. (42 sts)
15.) Change to color B. Sl st into back loop only of first st of previous row. (st you joined to) *hdc into next 6 st, ch 1, sk 1 st* around. Join with a sl st to first st of row, fasten off.
16.) Change to color A. Sl st into first st of previous row. (st you joined to) *sc in next 6 st, 2 dc in both loops of previous row* around. Join with a sl st to first st of row. Fasten off. (48 sts.)
17.) Change to color B. Sl st into back loop only of first st of previous row. (st you joined to). *hdc in next 7 st, ch 1, sk 1 st* around. Join with a sl st to the first st of the row.
18.) Change to color A. Sl st into first st of previous row. (st you joined to) *sc in next 7 st, 2dc in both loops of skipped st of previous row* around. DO NOT JOIN place Stitch Marker in last st of row. (54 sts)
19.) *Sc in back loop only of next 8 st., sc in next st* around
20-23.) *fpsc (front post single crochet) in next to st, bpsc (back post single crochet) in the next to st.* around.
24-26.) sc in each st around.
27.) *sc in next 8 st, 2 sc in next* around. (60 sts) sl st into next st and fasten off.
28.) Change to color B. Sl st into first st of previous row. (st you sl stitched into). *Pc in next st, ch 3, sk 3 sts* around. Join with a sl st and fasten off.
29.) Change to color A. Sl st into first st of row. (st you joined to.) *Sc in top of Pc, Dc in next 3 st of previous row* around. Join with a sl st.
30-31.) Ch 1, sc in each st around. Join with a sl st and fasten off after row 32.
32.) Repeat row 29
33.) Repeat row 30
34-35.) Repeat row 31-32
36.) Repeat row 29
37.) Change to color A. Sl st into first st of row. (st you sl stitched into) * sc in top of Pc, dc in next st of previous row, 2 dc in next st of previous row, dc in next st of previous row.* around. Join with a sl st. (75 sts)
38-39.) Ch 1, sc in each st around. Join with a sl st and fasten off.
40.) Change to color B. Sl into first st of row. (st you sl stitched into) *Pc in next st, ch 4, sk 4 sts* around. Join with a sl st and fasten off.
41.) Change to color A. Sl st into first st of row. (st you sl stitched into) * sc in top of Pc, dc in next 4 sts of previous row.* around. join with a sl st.
42-43.) Ch 1, sc in each st around, Join with a sl st AFTER ROW 44 DO NOT JOIN! Place stitch marker in last st of row.
44.) *2 sc in next st, sc in next 14* st around. ( 80sts)
45.) *2 sc in next st, sc in next 15* around (85 sts)
46.) sc in each st around, sl st into next st and fasten off leaving about a yard of yarn to sew on the base.
Base: ( Use color A)
1.) Using magic ring technique, start with 6 sc in magic ring. Place stitch marker in last sc of row.
2.) 2 sc in each sc around. (12 sts.) Make sure you are moving the stitch marker with each new row.
3.) *2 sc in next st, sc in next st* around (18 sts)
4.) *2 sc in next st, sc in next 2 sts* around (24 sts)
5.) *2 sc in next st, sc in next 3 sts* around (30 sts)
6.) *2 sc in next st, sc in next 4 sts* around (36 sts)
7.) *2 sc in next st, sc in next 5 sts* around (42 sts)
8.) *2 sc in next st, sc in next 6 sts * around (48 sts)
9.) *2 sc in next st, sc in next 7 sts* around (54 sts)
10.) *2 sc in next st, sc in next 8 sts* around (60 sts)
11.) *2 sc in next st, sc in next 9 sts* around (66 sts)
12.) *2 sc in next st, sc in next 10 sts* around (72 sts)
13.) *2 sc in next st, sc in next 11 sts* around (78 sts)
14.) *2 sc in next st, sc in next 12 sts* around (84 sts) sl st in next st and fasten off.
Eye: (When assembeling, eye should be attatched at row 10 of body.)
1.) Using color C and the magic ring technique start with 6 sc in magic ring DO NOT JOIN place stitch marker in last st of row and move it with each following row.
2.) 2sc in each st around (12sts) sl st into next st and fasten off
3.) Using color B sl st into first st of previous row (st you ls st into) *2sc in next st, sc in next st* around (18 sts)
4.) *sc in back loop only of the next st* around
5.) sc in each st around
6.) *sc 2tog, sc in next st* around (12 sts)
7.) *sc 2 tog* around (6 sts)
8-12.) sc in each st around. at the end of row 12 sl st into next st and fasten off leaving enough yarn attached to sew on eye.
"Gun" Arm: (Arms are attached to the body just below the ribbed section and just above the section with the "balls")
1.) Ch 2, 3 sc in 2nd st from hook. Place stitch marker
2.) 2 Sc in each st around (6sts)
3-12.) sc in each st around. Sl st into next st and fasten off leaving enough yarn attached to sew on arm.
"Plunger" Arm: (Arms are attached to the body just below the ribbed section and just above the section with the "balls")
Follow instructions for rows 1-7 of the "Gun" Arm, sl st into next st and fasten off leaving enough yarn to sew on arm.
1.) Sl St into row two and work 6 sl stitches around the end of arm. Place stitch marker in last st
2.) 2 sc in each st around (12 sts)
3.) *2sc in next st, sc in next st* around (18 sts)
4-10.) *2sc in next st, sc in next 2 sts* around (24 sts) Sl st into next st and fasten off. Weave in loose ends and attach to body.
11.) Using sl st, attach to to row 2 of "arm" you just made and work 6 slip stitches around the end of the arm. place st marker.
12.) *2 sc in each st* around. (12 sts)
13.) *2 sc in next st, sc in next st* around (18 sts)
14.) * 2 sc in next st, sc in next 2 sts* around (24 sts) sl st into next st, fasten off and weave in loose end.
"Lights": Make 2 (As I originally forgot about them, the "lights" are not shown in the pics. Lights are attached at the top of the Dalek's "head" with one being to each side of the "eye" and a little farther back. [almost like horns or antlers.])
1.) Using color B (or white if you like) and magic circle technique, Start with 6 sc in magic circle. Place stitch marker.
2.) *2 sc in each st* around (12 sts)
3.) *sc in back loop only of next st* around
4-7.) sc in each st around. Sl st into next st, fasten off leaving enough yarn to attach to body.
Now all you have to do is stuff (stuff firmly!) all the parts and assemble! I cut a cardboard circle the same size as the base and sewed in after I stuffed the body to give it a flat bottom and help the whole thing stand better.
Finished project stands approx. 17 inches tall and is approx. 10 inches wide at the base.
Have fun with this one and I would love to hear what you think about the pattern.
Stormi
Edit: I added the pattern for the "lights" (not pictured) and added the missing part of the "plunger" arm pattern.
Edit 2: There was a mistake in the main body pattern. Fixed now!